How to Clean Hydration Bladder
For those not familiar, hydration bladders are soft-sided plastic packs with drinking tubes to allow people to drink without stopping their run. They are small enough to fit inside backpack pockets while also capable of carrying enough water to keep you hydrated during the most strenuous outdoor adventures. It’s also simple to use. Just take the drinking tube and just suck it like you’re drinking water from a straw
You might be asking yourself, “why do I need to clean my hydration pack since I’ve already filled it with clean water?” Because, your hydration pack can be infested by bacteria and mold if left uncleaned. Well, since you clicked on this article on how to clean your hydration bladder, we are here to guide you.
1. Gather your cleaning supplies

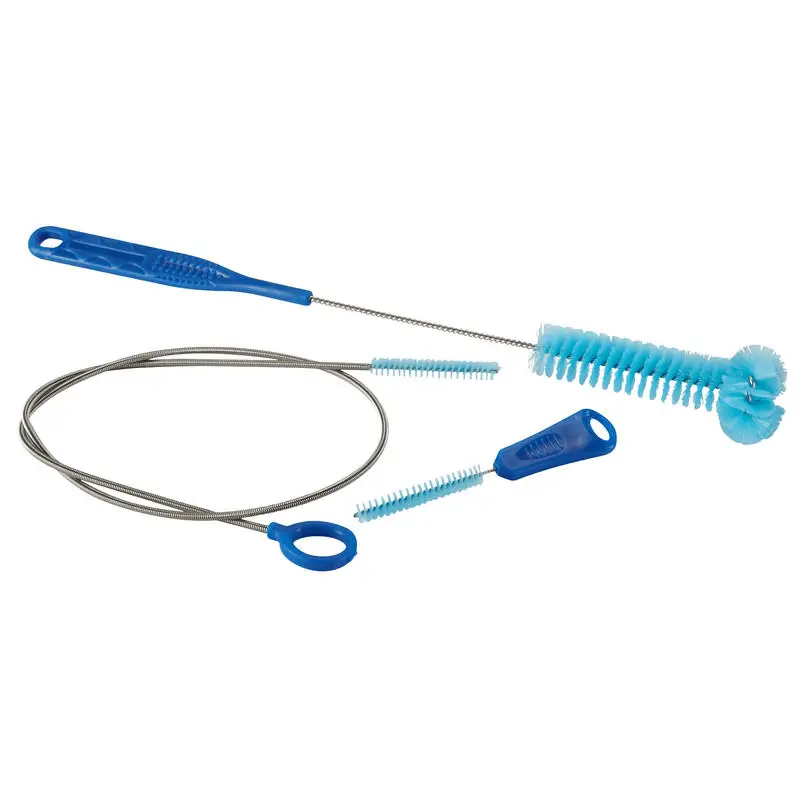
Obviously, the first and most important step is to have your supplies ready before cleaning the hydration bladder. Typically, the tools you will need include a long brush for cleaning the pack itself, a small brush for cleaning the bite valve and a flexible snake brush for cleaning the drinking tube. You will also need a mild dish soap with cleaning solutions such as household bleach, baking soda and lemon juice as well as clothespins or hangers to dry it once you’re finished cleaning it.
2. Soak it

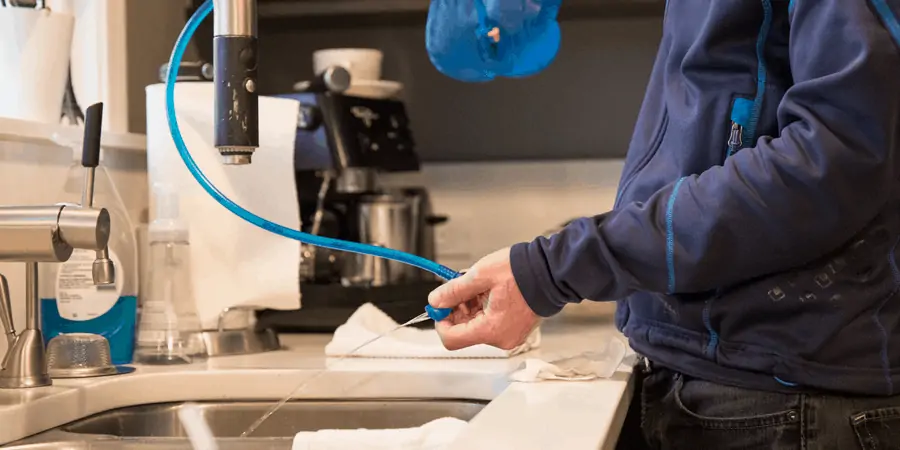
Now we can start cleaning the hydration bladder. First, start by adding warm water to the bladder and any cleaning solutions, seal the bladder up and shake it. After that, lift the bladder up, leaving the drinking tube to aim at the sink. Then, pinch the bite valve until water flows through the tube. This ensures that both the bladder and the tube are filled with the cleaning mixture. The soaking should take about 20 minutes after which you can drain the mixture and proceed with the next step.
3. Scrub and Rinse it.

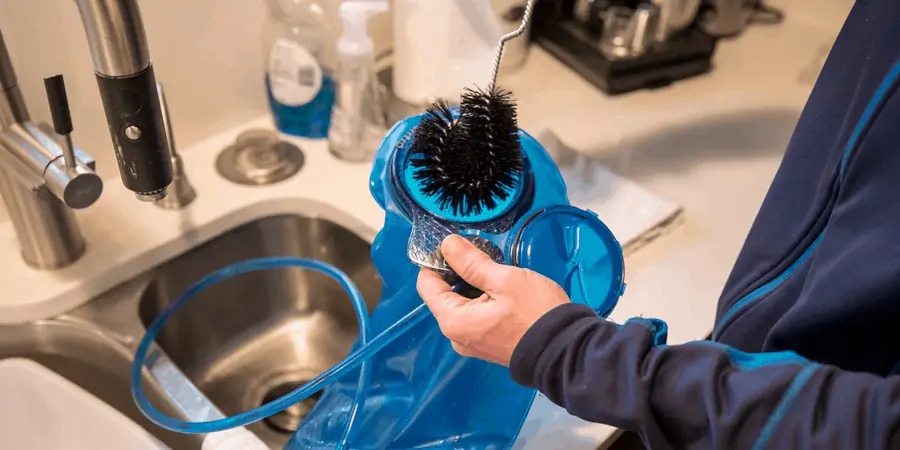
Same as the previous step, fill up the bladder and tube with warm water but mix it with a little dish soap. Disassemble the bite valve from the tube and use the brushes to scrub all the pieces of the hydration bladder separately. Use the long brush for the bladder itself, the short bladder for the bite valve and the flexible snake brush for the drinking tube. Once you’re done, thoroughly rinse the pieces until no traces of the soap mixture remain.
4. Dry it.

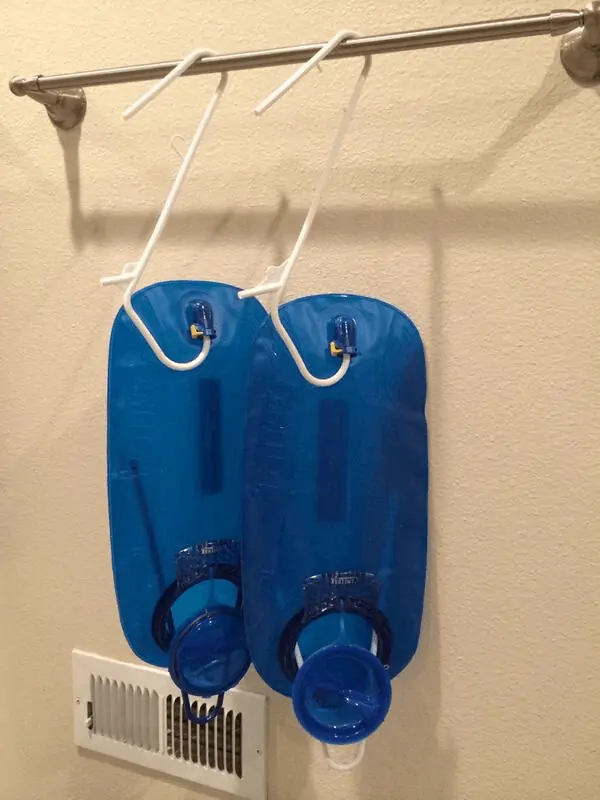
Now that the cleaning is done, the last step is to leave all pieces of the hydration bladder to dry. It is better to leave the pieces somewhere where there is little to no moisture which invites mold growth such as a drying rack outside beneath the hot sun.
==========================================
And there you have it, those are the 4 steps of how to clean hydration bladder. With a clean hydration bladder, you won’t become sick from drink mold or bacteria-infested drinking water. That is why it is important to always clean them once you come back home from your outdoor adventure. Now that you know how to clean hydration bladder, why don’t you share it with your friends as well so that they know how to?
By the way, if you guys like the content that we provide, do join our Malaysia Outdoor Community group, where we share a lot of information about the outdoors in general! Also, shop our latest outdoor gears deal too!


Shop Our Gears
Camp & Hike
TAHAN
COMBO
SLEEP SYSTEM
More tips that you might find useful:
12 Secrets to Getting Cheap Flights in Malaysia
1 Comments
马来西亚露营:户外探险综合指南
Camping in Malaysia: A Comprehensive Guide to Outdoor Adventures
2 Comments
Conquering Mount Kinabalu: A Hiker’s Guide to Malaysia’s Highest Peak
Camp Cooking Gear Guide – Build the Ultimate Camp Kitchen!
Top 5 Most Popular Campsites in Selangor
Ultimate Guide to Tropical Leisure Camping in Malaysia: TAHAN’s Top 5 Gear Picks
The Ultimate Guide to Hammock in Malaysia: Comfort, Adventure, and Relaxation